For whole-house low pressure, check three things first: the main shut-off valve (fully open?), the pressure reducing valve (failed?), and your neighbors (is it a municipal issue?). These cover most causes.
When every faucet in your home has weak flow, the problem is in your main water supply system. Work through this checklist systematically to identify and fix the cause.
First: Rule Out a Municipal Issue
Before troubleshooting your home, verify the city supply is normal.
Quick Municipal Check
- Ask your neighbors if they’re experiencing low pressure
- Check for water main work in your area (look for notices, construction)
- Contact your water utility to ask about known issues or scheduled work
- Test your outdoor hose bib closest to the meter—if it’s also weak, it’s likely not your home’s problem
If neighbors have the same issue, wait for the utility to resolve it. If it’s just your home, continue troubleshooting.
Check Your Main Shut-Off Valve
The main shut-off valve controls all water entering your home. If it’s partially closed, everything suffers.
Locating Your Main Valve
- Basement: Often near the front foundation wall
- Crawl space: Near where the water line enters
- Garage: On the wall closest to the street
- Utility closet: Common in condos and apartments
- Outside: In a ground box near the meter (warmer climates)
Valve Types and Operation
Gate valve (round wheel handle):
- Turn counterclockwise until it stops to fully open
- May require multiple turns
- Common in older homes
Ball valve (lever handle):
- Lever should be parallel to the pipe when open
- Quarter turn opens or closes completely
- Newer, more reliable design
If your main valve hasn’t been turned in years, it may be stuck or corroded. Don’t force it—you could break it and have no way to shut off water. A plumber can replace a seized valve.
Testing the Main Valve
- Turn the valve fully clockwise (closed)
- Turn it fully counterclockwise (open)
- Test water pressure at the nearest fixture
- If pressure improves significantly, the valve was partially closed
Inspect the Pressure Reducing Valve (PRV)
Many homes have a PRV (also called a pressure regulator) that limits incoming municipal pressure to safe levels. When PRVs fail, they often fail closed, restricting flow.
Finding Your PRV
The PRV is typically located:
- Just after the main shut-off valve
- On the main water line entering your home
- It looks like a bell or cone shape with an adjustment screw on top
Signs of a Failing PRV
- Sudden pressure drop without other cause
- Pressure fluctuates throughout the day
- You hear the PRV humming or vibrating
- PRV is more than 10-15 years old
PRV Adjustment
Before replacing, try adjusting:
- Locate the adjustment screw on top (may have a locknut)
- Loosen the locknut if present
- Turn the screw clockwise to increase pressure
- Turn counterclockwise to decrease pressure
- Make small adjustments (quarter turns)
- Test pressure and repeat as needed
- Don’t exceed 60-70 PSI
If adjustment doesn’t help or the PRV is old, replacement is recommended. This is a moderate DIY project but requires shutting off water at the meter.
Install a pressure gauge on your hose bib before and after PRV adjustments. This tells you exactly what your pressure is, not just how it “feels.”
Check the Water Meter Valve
There’s typically a valve at the water meter itself, which is utility property but can affect your pressure.
Meter Valve Check
- Locate your water meter (usually in a ground box near the street)
- Look for a valve on the house side of the meter
- Ensure it’s fully open (handle parallel to pipe or fully turned counterclockwise)
- Note: Some meter valves require a special key—contact your utility
This valve might have been partially closed during utility work and never fully reopened.
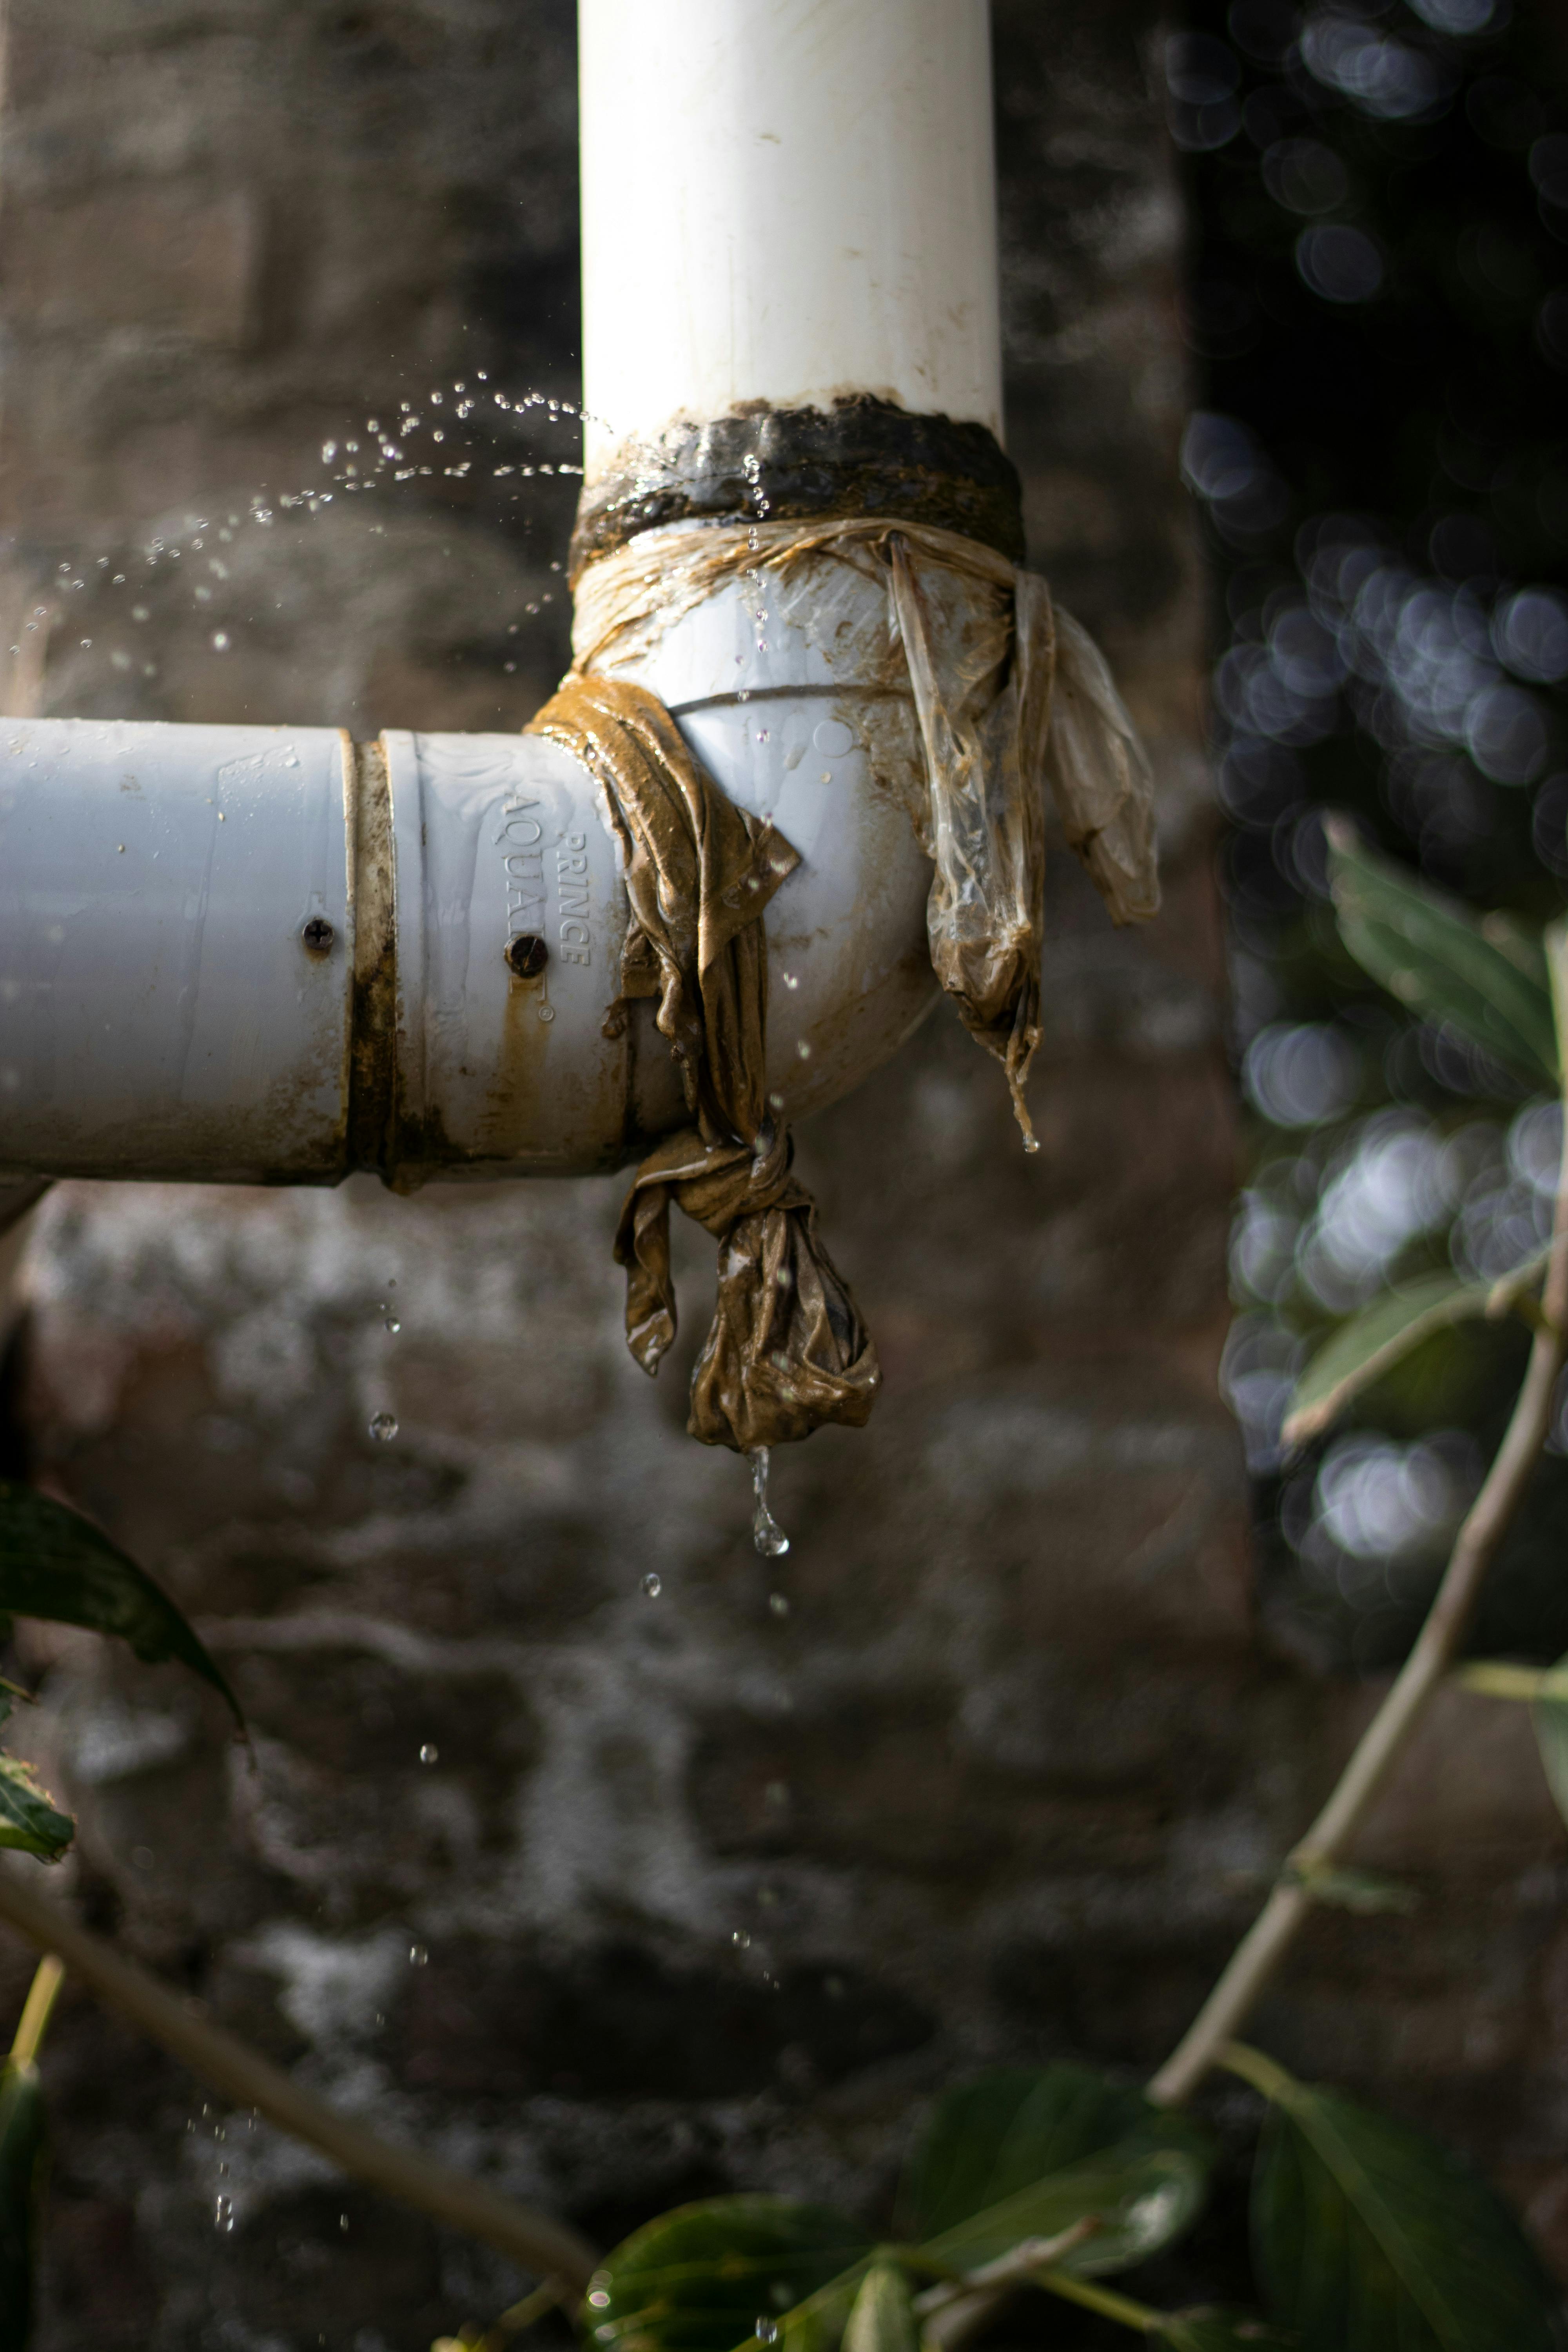
Look for Leaks
A significant leak anywhere in your system will reduce pressure throughout the house.
Signs of Hidden Leaks
- Water meter spinning when nothing is running
- Higher than normal water bills
- Damp spots on walls, floors, or ceilings
- Sound of running water when all fixtures are off
- Wet spots in yard, especially in a line from meter to house
Leak Detection Test
- Turn off all water-using appliances and fixtures
- Record the water meter reading
- Wait 2 hours without using any water
- Check the meter again—any movement indicates a leak
If you have a leak, finding and fixing it will restore pressure. Underground leaks or slab leaks require professional detection and repair.
Evaluate Your Pipes
The pipes themselves can be the problem, especially in older homes.
Galvanized Steel Pipes
Homes built before 1970 often have galvanized steel pipes that corrode internally over time. This buildup restricts water flow progressively.
Signs of corroded galvanized pipes:
- Gradually decreasing pressure over years
- Brown or rusty water, especially when first turned on
- Pressure worse at faucets farthest from main
- Visible corrosion at exposed pipe joints
The only real fix is repiping, usually with copper or PEX. This is a major project but dramatically improves pressure and water quality.
Undersized Pipes
Some older homes or additions have pipes that are too small for modern usage:
- Main line should be 3/4” or 1”
- Branch lines should be 1/2” minimum
- Multiple fixtures running simultaneously reveals undersizing
Upgrading main supply lines can significantly improve whole-house pressure.
Check Your Well System (If Applicable)
Homes with well water have additional components that can cause pressure problems.
Well Pressure Tank Issues
- Check the tank pressure with the pump off (should be 2 PSI below cut-in pressure)
- A waterlogged tank causes rapid pump cycling and pressure drops
- Tank bladders can fail, reducing the tank’s effective capacity
Pump Problems
- Listen for the pump—is it running constantly?
- Check the pressure switch settings (typically 30/50 or 40/60 PSI)
- A failing pump can’t maintain adequate pressure
- Well pumps last 10-15 years on average
Well Yield Issues
- Low-producing wells can’t keep up with demand
- Pressure drops during heavy usage, then recovers
- May need to drill deeper or install a holding tank
Testing Your Pressure
Get actual numbers, not just impressions:
Using a Pressure Gauge
- Buy a water pressure gauge with hose thread ($10-15)
- Attach to an outdoor hose bib
- Turn off all other water in the house
- Open the hose bib fully
- Read the pressure
Pressure readings:
- Below 30 PSI: Very low, needs investigation
- 30-40 PSI: Low, may need PRV adjustment or other fixes
- 40-60 PSI: Normal range
- 60-80 PSI: High end of acceptable
- Above 80 PSI: Too high, can damage fixtures
DIY vs. Call a Pro
DIY-friendly fixes:
- Opening main or meter valves
- Adjusting PRV
- Replacing pressure gauge
- Minor leak repairs
Call a plumber for:
- PRV replacement
- Corroded pipe evaluation or repiping
- Main water line repairs
- Well system problems
- Leak detection for hidden leaks
Prevention
- Test pressure annually with a gauge
- Exercise main shut-off valve yearly
- Replace PRV every 10-15 years proactively
- Address small leaks before they become big problems
- Upgrade galvanized pipes before they fail completely
Next Steps
If pressure is only low at certain fixtures, see Low Water Pressure in One Faucet. For all plumbing issues, our Plumbing Fixes Guide provides comprehensive repair instructions. And make sure everyone in your home knows where your shut-off valves are located.